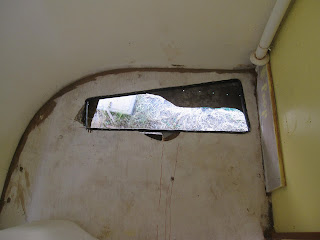
How do you appropriately convey to another person your own personal hell?
Mine just ended. I no longer carry its burden. Please, follow me as I take you through the highlights of the worst part of Bessie.
The toilet system that came with Bessie was simply disgusting. Here's a photo of the shitbox...
 Hideous. Doesn't it look like someone missed the toilet and shat all over the walls? And what's with the brown cushion? What a terrible, terrible design choice. Also, the ceramic "bowl" looks like a drawer you can remove. Anyone want to poop in my dresser?
I can't even relate to you how awful it was to remove. I couldn't do it. I literally couldn't do it. Brie, with her smaller adroit hands, was able to reach behind the shitcan and use a crescent wrench to remove the blind nut from the one screw that was hidden so far and deep within a hole in the back of the can that... I must stop. I'll never end the rant. Brie saved the day with her magic thumb and we were able to remove the dumper-drawer.
So I moved to the next task - removing the black water tank. You must disconnect the bottom of the black water tank in order to remove it, so I looked under Bessie and found this bullshit.
 Yes, that's a duct-taped sewer pipe. This will be vile. I removed the duct tape.
 What the hell is this? A plaster-o-paris sewage system? I removed the plumber's putty. So gross.
 Oh look. There actually isn't a pipe at all. Simply trashbags held in place with plumbers putty and duct tape. Nice work asshole. Nothing salvageable in this project.
 Yes, that's a duct-taped sewer pipe. This will be vile. I removed the duct tape.
 What the hell is this? A plaster-o-paris sewage system? I removed the plumber's putty. So gross.
 Oh look. There actually isn't a pipe at all. Simply trashbags held in place with plumbers putty and duct tape. Nice work asshole. Nothing salvageable in this project.
After a few more hours, I ripped the black tank out of her for good. Triumph in the cold Oregon rain.
 What to do now? It took two weeks to find a replacement tank. Brie and I talked at length, calculated our water needs, the weight of the new tank and water, the dimensions, the possibilities, and finally found the perfect 16-gallon tank. We ordered it and waited. And waited. And waited. The fresh water tank (from the same order) arrived, but no black water tank. After a month I called. The order was lost. They resent it. Two more weeks and I had the tank. It had no holes in it. No one within an hour's drive could cut the holes for me. The tank waited. I waited. Finally I had enough. It took me a day of vacation time, but I got the damn holes drilled. Now I just need the blade valve parts. Camping World doesn't carry them. I can order them. I ordered them. The arrived two weeks later. I picked them up from Camping World. Camping World gave me the wrong parts. I went in the field for two weeks. I returned. I returned the goddamn wrong parts. I exchanged for the right parts. I instantly put the right parts into the tank and put the tank into Bessie. Then I set about finalizing the toilet so I will never have to deal with this project ever, ever again.
 What to do now? It took two weeks to find a replacement tank. Brie and I talked at length, calculated our water needs, the weight of the new tank and water, the dimensions, the possibilities, and finally found the perfect 16-gallon tank. We ordered it and waited. And waited. And waited. The fresh water tank (from the same order) arrived, but no black water tank. After a month I called. The order was lost. They resent it. Two more weeks and I had the tank. It had no holes in it. No one within an hour's drive could cut the holes for me. The tank waited. I waited. Finally I had enough. It took me a day of vacation time, but I got the damn holes drilled. Now I just need the blade valve parts. Camping World doesn't carry them. I can order them. I ordered them. The arrived two weeks later. I picked them up from Camping World. Camping World gave me the wrong parts. I went in the field for two weeks. I returned. I returned the goddamn wrong parts. I exchanged for the right parts. I instantly put the right parts into the tank and put the tank into Bessie. Then I set about finalizing the toilet so I will never have to deal with this project ever, ever again.
Here are the highlights along the way. A new ceramic china bowl terlet. Ooo, the contours...
 Ergonomics check. This one might be a little too high. Would eventually swap it for a lower rise terlet so it would fit the dimensions over the tank. You'll see.
Let's take a quick recap of the process. Step 1, rip out the shitbox. This is what's left...

Paint the walls...

Pretty cool, huh? Now cut a hole for the black water tank. Line with a bicycle tire (great idea Brie!) to help with shock absorption...

Check the dimensions, measure the hole, get the hole cut...

Drop the tank through the hole and equip with blade valve...

Build a support box, lay the bamboo flooring, and install terlet. Don't forget to connect vent tube...

You may be able to tell the terlet sits a little lower than the previous one. Still, it sits too high, so install the step box...

Reinstall primed and painted bathroom counter frame...
 Add sanded and stained drawers and newly cut plywood counter top...
 And you've got the makings of a traveling terlet. A portable potty. A bastion of Bouncing Bullet bowel movements. Yes, I will stop.
 I shortened the length of the terlet step after I took the photo below, since it prevented the drawer from opening. We will re-rig the drawer to be a hinged opening for a cubby hole, so I only shortened the step by two inches (or less)...
 Ahh. Fully floored and ready for the sink.
 Ahh. Fully floored and ready for the sink.
Ugh.


